
Google AI Overview API
Enables fetching Google's AI Overview answers and cited sources as structured JSON, with support for batch queries and country/language targeting.
README
🔎 Google AI Overview API: Get Google's AI answer and its sources as JSON
The most efficient, reliable, and developer-friendly way to use the Google AI Overview API.
Actor page: apify.com/johnvc/Google-AI-Overview-API Input schema: apify.com/johnvc/Google-AI-Overview-API/input-schema
Send any search query and get back Google's AI Overview, the AI-generated answer that appears at the top of Google's results, as structured JSON: the answer text blocks plus the sources it cites (title, link, snippet, and source name). When Google defers generation and returns only a short-lived token, this API resolves the full answer for you automatically, so you always get clean, ready-to-use data.
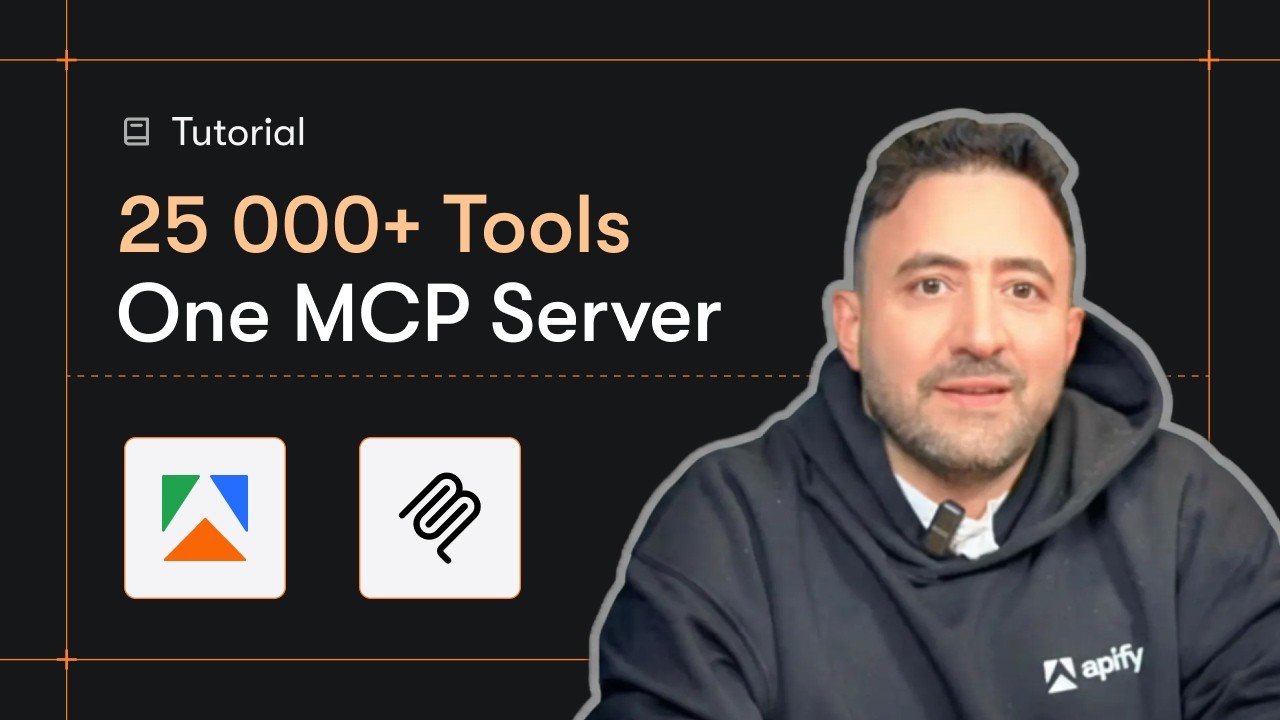
Video Walkthrough
Quick Start
Prerequisites
- Python 3.11 or higher
- An Apify account and API key (get a free key here)
-
Clone the repository
git clone https://github.com/johnisanerd/Apify-Google-AI-Overview-API.git cd Apify-Google-AI-Overview-API -
Install dependencies with UV
# Install UV if you do not have it: curl -LsSf https://astral.sh/uv/install.sh | sh # Install project dependencies: uv sync -
Configure your API key
cp .env.example .env # Edit .env and add your Apify API key # Get your free API key at: https://apify.com?fpr=9n7kx3 -
Run the example
uv run python google-ai-overview-api-example.py
Alternative: set the API key directly
export APIFY_API_TOKEN="your_api_key_here"
uv run python google-ai-overview-api-example.py
Why Use This Google AI Overview API?
Just the answer, structured. You get the AI Overview content and its cited sources as clean JSON, ready to drop into a database, a report, or an LLM pipeline. No HTML parsing.
It handles Google's deferral for you. Google sometimes returns the AI Overview immediately and sometimes defers it behind a short-lived token. This API resolves that follow-up automatically in a single run, so you never have to manage tokens that expire in under a minute.
One query or many. Pass a single query or a queries list. You get one result row per query, which makes batch lookups and GEO/AEO monitoring straightforward.
Pay only for what you fetch. Pricing is per retrieval: one retrieval for a standard inline answer, two only when Google defers and a follow-up is required. The output tells you exactly how many were used.
Country and language targeting. Choose the country (gl) and language (hl), or narrow to a specific location.
MCP-ready. Load it as a tool in Claude Cowork, Claude Code, Claude on the web, and Cursor (see below) and ask for an AI Overview in plain language.
Features
Core Capabilities
- Returns the AI Overview answer as ordered
text_blocks(paragraphs, headings, lists) - Returns the cited
referencesfor each answer (title, link, snippet, source) - Automatic resolution of Google's deferred (token-based) generation
- Single-query and batch (
queries) input, one row per query - Country, language, and location targeting
Data Quality
- Clean, typed JSON output, one row per query, with a stable
result_typefield - A clear
ai_overview_presentflag and anotewhen Google shows no overview - Transparent
retrievals_usedcount so cost is never a surprise
Usage Examples
Basic Example
{
  "query": "what is the Siliconimist podcast?"
}
Advanced Example
{
  "queries": [
    "best practices for prompt engineering",
    "how does vector search work"
  ],
  "gl": "us",
  "hl": "en",
  "location": "Austin, Texas, United States"
}
Input Parameters
| Parameter | Type | Required | Default | Description |
|---|---|---|---|---|
query |
str |
one of query / queries |
- | A single search query to fetch the AI Overview for. |
queries |
list[str] |
one of query / queries |
- | Multiple queries in one run; one result row per query. Merged with query. |
gl |
str |
no | us |
Country code (ISO 3166-1), e.g. us, gb, ca. |
hl |
str |
no | en |
Language code (ISO 639-1). AI Overviews are currently English-only. |
location |
str |
no | - | Optional location to narrow results, e.g. Austin, Texas, United States. |
At least one of query or queries is required.
Output Format
One row per query. Each item has a result_type of ai_overview or error. The answer text and sources below are illustrative; your run returns the live AI Overview content and its real citations.
{
  "result_type": "ai_overview",
  "query": "what is retrieval augmented generation",
  "ai_overview_present": true,
  "used_dedicated_api": false,
  "retrievals_used": 1,
  "text_blocks": [
    {
      "type": "paragraph",
      "snippet": "<AI Overview answer paragraph for the query>"
    }
  ],
  "references": [
    {
      "title": "<cited source title>",
      "link": "https://www.example.com/source",
      "snippet": "<short snippet from the cited source>",
      "source": "Example",
      "index": 1
    }
  ],
  "gl": "us",
  "hl": "en",
  "fetched_at": "2026-05-28T08:33:58.988871+00:00"
}
When Google does not show an AI Overview for a query, the row comes back with "ai_overview_present": false and a short note explaining why.
Use as an MCP tool
You can load the Google AI Overview API as an MCP tool so assistants call it for you. The MCP server URL preloads just this one Actor:
https://mcp.apify.com/?tools=actors,docs,johnvc/Google-AI-Overview-API
Authenticate with OAuth in the browser when offered, or with your Apify API token (the same APIFY_API_TOKEN used by the Python example). Get a token at https://console.apify.com/settings/integrations and a free Apify account at https://apify.com?fpr=9n7kx3 .
Install in Claude Cowork Desktop
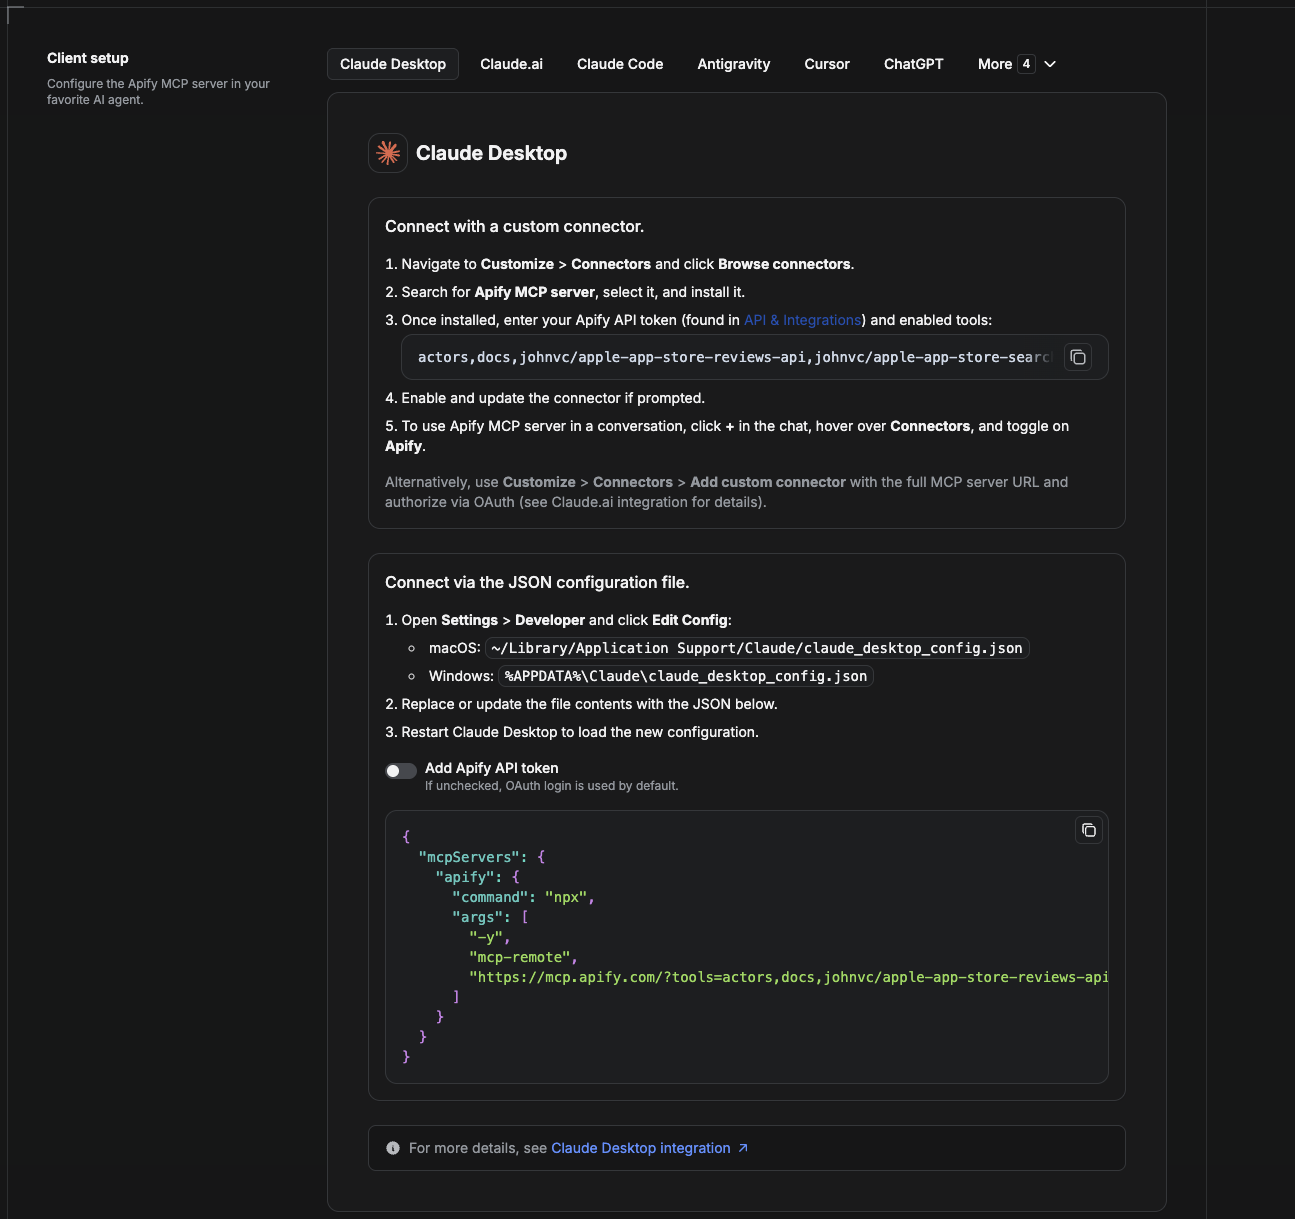
Cowork is the desktop app's automation mode. To give it the Google AI Overview API as a tool, add the Apify MCP server as a connector.
- Open the Claude desktop app and go to Settings → Connectors (or Settings → Developer → Edit Config to edit
claude_desktop_config.jsondirectly).- macOS:
~/Library/Application Support/Claude/claude_desktop_config.json - Windows:
%APPDATA%\Claude\claude_desktop_config.json
- macOS:
- Add the Apify MCP server, preloaded with only this Actor:
{
  "mcpServers": {
    "apify": {
      "command": "npx",
      "args": [
        "-y",
        "mcp-remote",
        "https://mcp.apify.com/?tools=actors,docs,johnvc/Google-AI-Overview-API"
      ]
    }
  }
}
- Restart the app. When Cowork first calls the tool, complete the OAuth prompt in your browser, or add your Apify API token in the connector settings to skip OAuth.
- In a Cowork chat, confirm the tool is available and ask it to run the Google AI Overview API.
Download the desktop app and start a free trial: https://claude.ai/referral/uIlpa7nPLg More help: https://docs.apify.com/platform/integrations/claude-desktop
Install in Claude Code
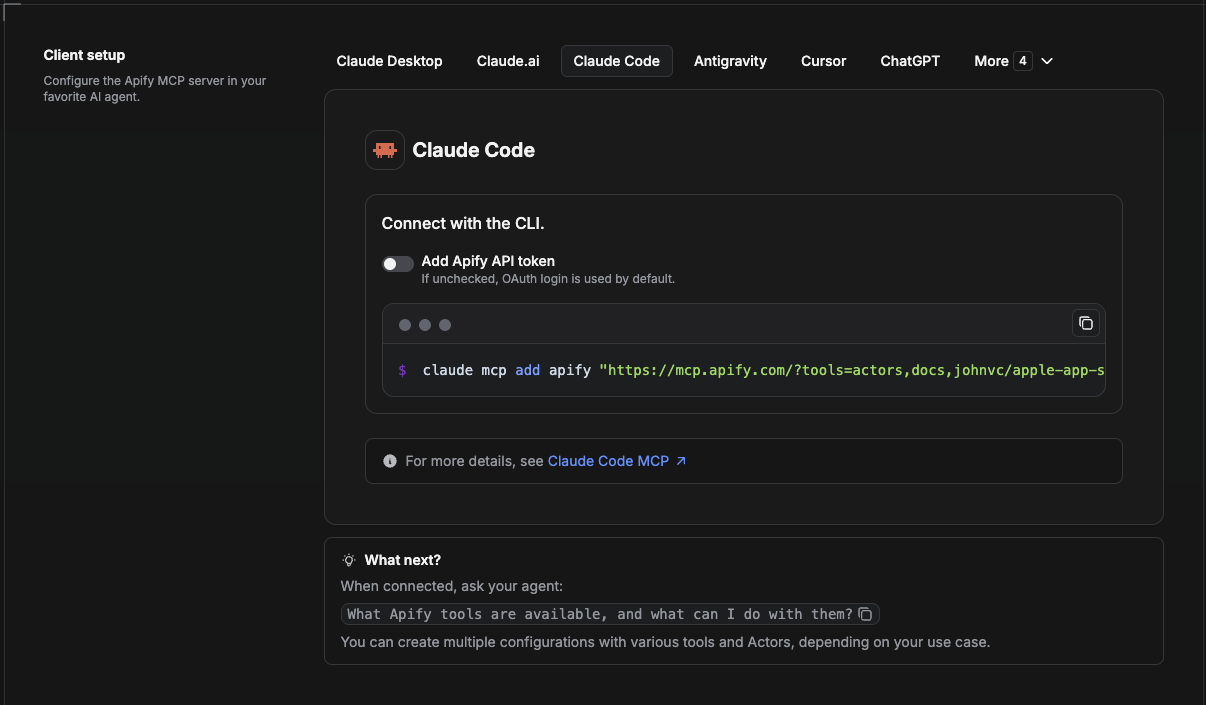
Claude Code is the command-line tool. Add the Actor's MCP server with one command:
claude mcp add --transport http apify \
  "https://mcp.apify.com/?tools=actors,docs,johnvc/Google-AI-Overview-API"
To use a token instead of browser OAuth:
claude mcp add --transport http apify \
  "https://mcp.apify.com/?tools=actors,docs,johnvc/Google-AI-Overview-API" \
  --header "Authorization: Bearer YOUR_APIFY_TOKEN"
Then verify with claude mcp list, or run /mcp inside a session. Ask Claude Code to call the Google AI Overview API.
Try Claude Code free: https://claude.ai/referral/uIlpa7nPLg Claude Code MCP docs: https://code.claude.com/docs/en/mcp
Install in Claude (website)
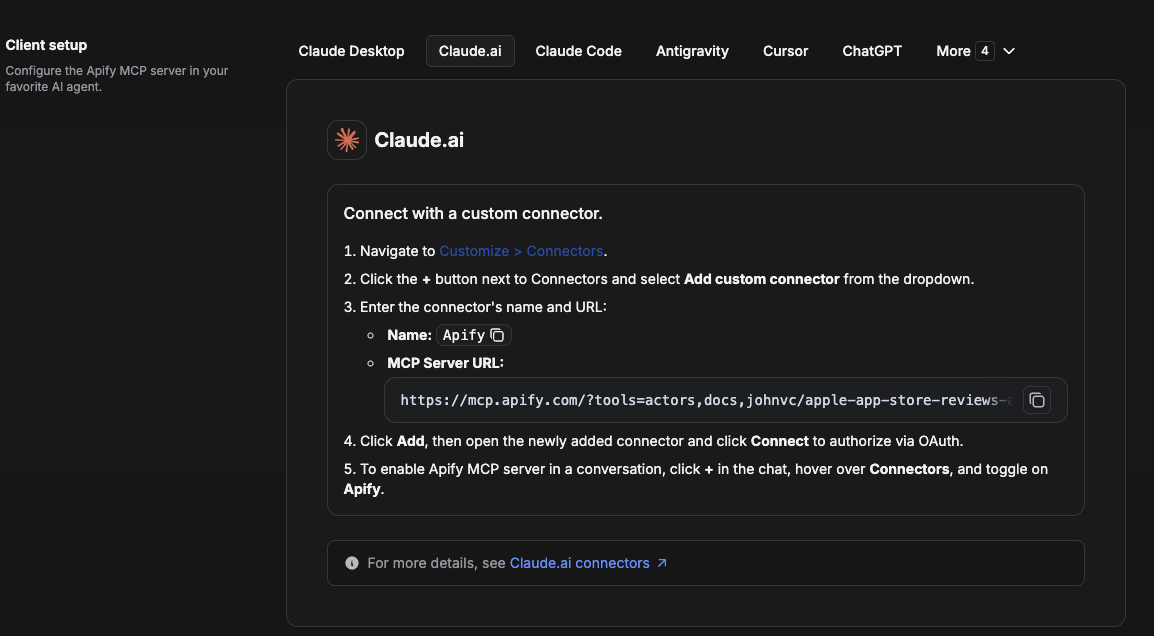
On claude.ai you add Apify as a connector, then enable just this Actor's tool.
- Go to Settings → Connectors → Browse connectors and search for Apify MCP server. Install it (enable or update if prompted).
- When connecting, authenticate with your Apify API token, and enable the tool
johnvc/Google-AI-Overview-API. - In any chat, open + → Connectors and turn on Apify.
- Alternatively, choose Add custom connector and paste the full MCP URL
https://mcp.apify.com/?tools=actors,docs,johnvc/Google-AI-Overview-API, using OAuth when prompted. - Ask Claude to run the Google AI Overview API.
Open Claude on the web: https://claude.ai/referral/uIlpa7nPLg
Install in Cursor
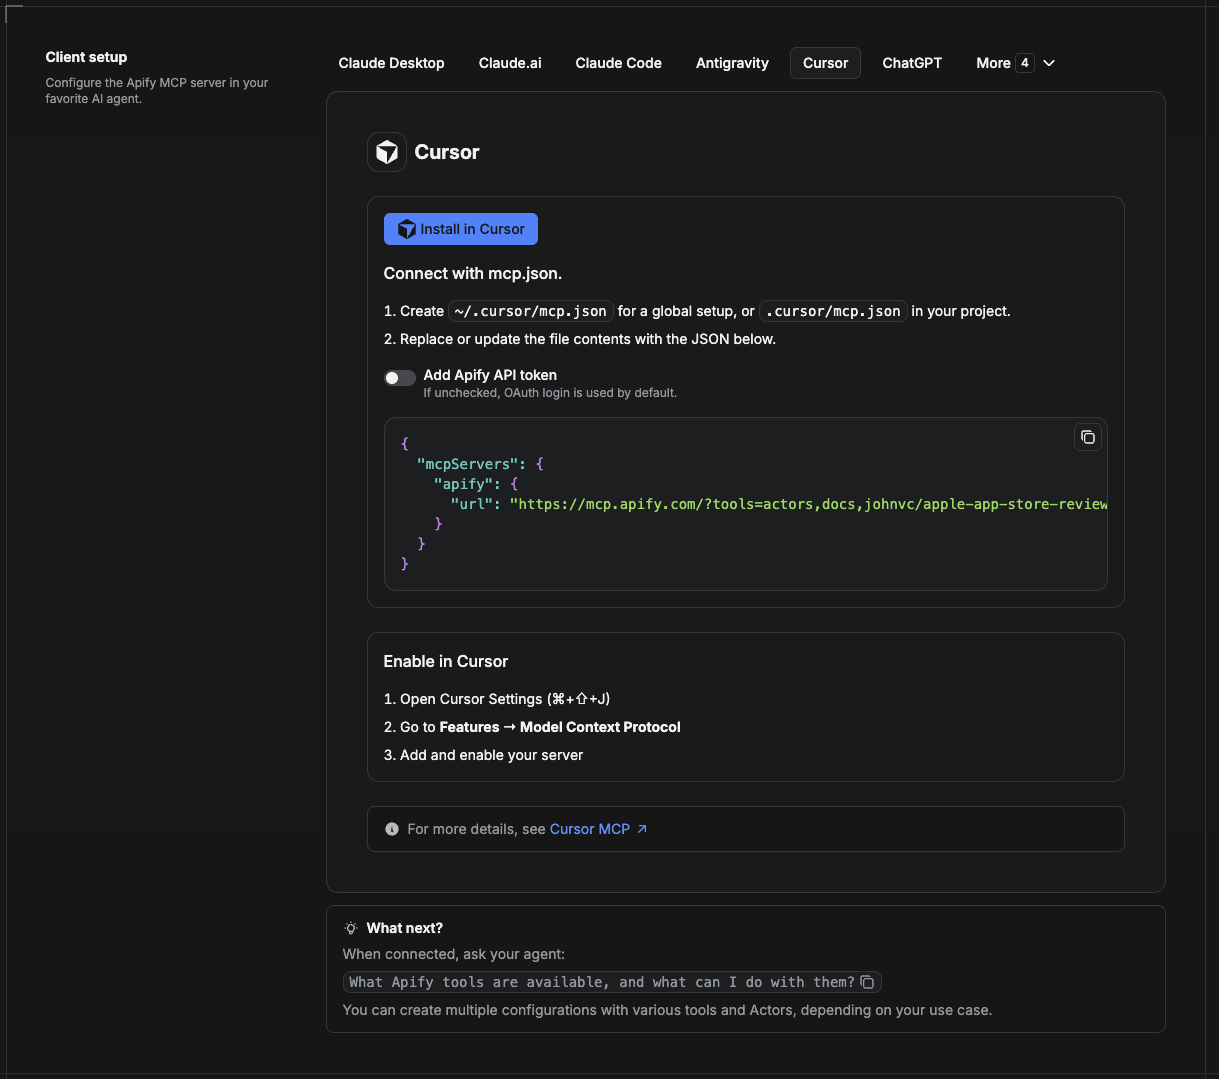
Cursor reads MCP servers from a project file at .cursor/mcp.json.
- In your project, create
.cursor/mcp.json:
{
  "mcpServers": {
    "apify": {
      "url": "https://mcp.apify.com/?tools=actors,docs,johnvc/Google-AI-Overview-API"
    }
  }
}
- If you prefer token auth over browser OAuth, add a header:
{
  "mcpServers": {
    "apify": {
      "url": "https://mcp.apify.com/?tools=actors,docs,johnvc/Google-AI-Overview-API",
      "headers": { "Authorization": "Bearer YOUR_APIFY_TOKEN" }
    }
  }
}
- Open Cursor → Settings → MCP and confirm the apify server is connected (green dot).
- In Composer or Chat, ask Cursor to call the Google AI Overview API.
New to Cursor? Get it here: https://cursor.com/referral?code=XQP4VBLI3NNX
Install in ChatGPT
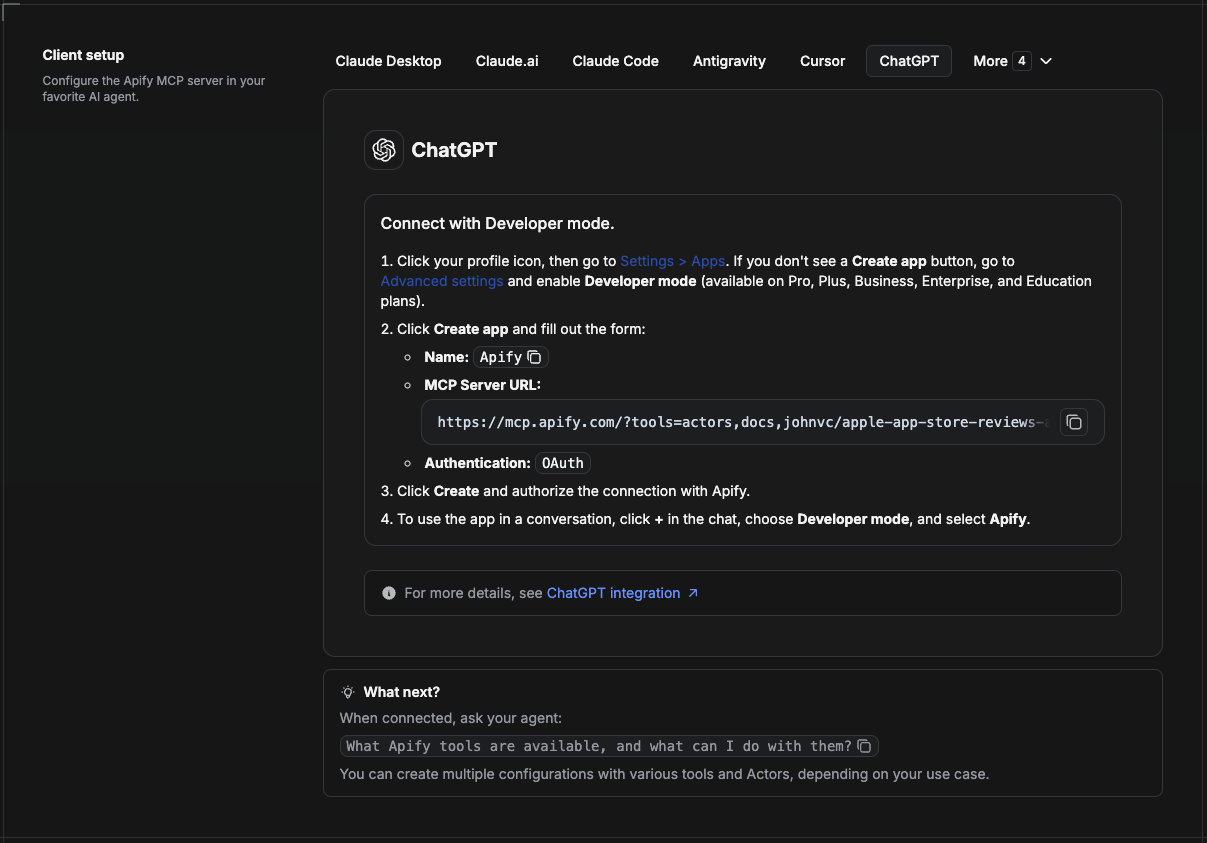
ChatGPT connects to the Apify MCP server through Developer mode (available on ChatGPT Pro, Plus, Business, Enterprise, and Education plans).
- Click your profile icon, then go to Settings > Apps. If you do not see a Create app button, open Advanced settings and enable Developer mode.
- Click Create app and fill out the form:
- Name: Apify
- MCP Server URL:
https://mcp.apify.com/?tools=actors,docs,johnvc/Google-AI-Overview-API - Authentication: OAuth
- Click Create and authorize the connection with Apify.
- To use the app in a conversation, click + in the chat, choose Developer mode, and select Apify.
More help: https://docs.apify.com/platform/integrations/mcp
Use the Google AI Overview API to power GEO/AEO monitoring, research, and content workflows with reliable, structured results.
Last Updated: 2026.07.31
Recommended Servers

playwright-mcp
A Model Context Protocol server that enables LLMs to interact with web pages through structured accessibility snapshots without requiring vision models or screenshots.

Magic Component Platform (MCP)
An AI-powered tool that generates modern UI components from natural language descriptions, integrating with popular IDEs to streamline UI development workflow.

Audiense Insights MCP Server
Enables interaction with Audiense Insights accounts via the Model Context Protocol, facilitating the extraction and analysis of marketing insights and audience data including demographics, behavior, and influencer engagement.

VeyraX MCP
Single MCP tool to connect all your favorite tools: Gmail, Calendar and 40 more.

graphlit-mcp-server
The Model Context Protocol (MCP) Server enables integration between MCP clients and the Graphlit service. Ingest anything from Slack to Gmail to podcast feeds, in addition to web crawling, into a Graphlit project - and then retrieve relevant contents from the MCP client.

Kagi MCP Server
An MCP server that integrates Kagi search capabilities with Claude AI, enabling Claude to perform real-time web searches when answering questions that require up-to-date information.

E2B
Using MCP to run code via e2b.

Neon Database
MCP server for interacting with Neon Management API and databases

Exa Search
A Model Context Protocol (MCP) server lets AI assistants like Claude use the Exa AI Search API for web searches. This setup allows AI models to get real-time web information in a safe and controlled way.

Qdrant Server
This repository is an example of how to create a MCP server for Qdrant, a vector search engine.